How To Install
Theme Installation
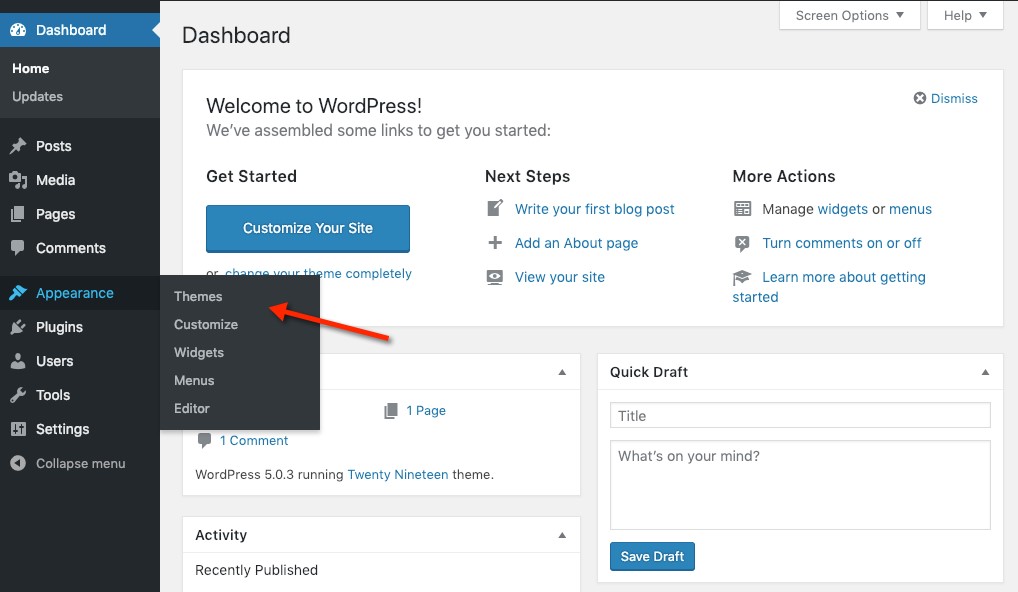
Step 1: Navigate to Appearance → Themes in your WordPress admin dashboard.
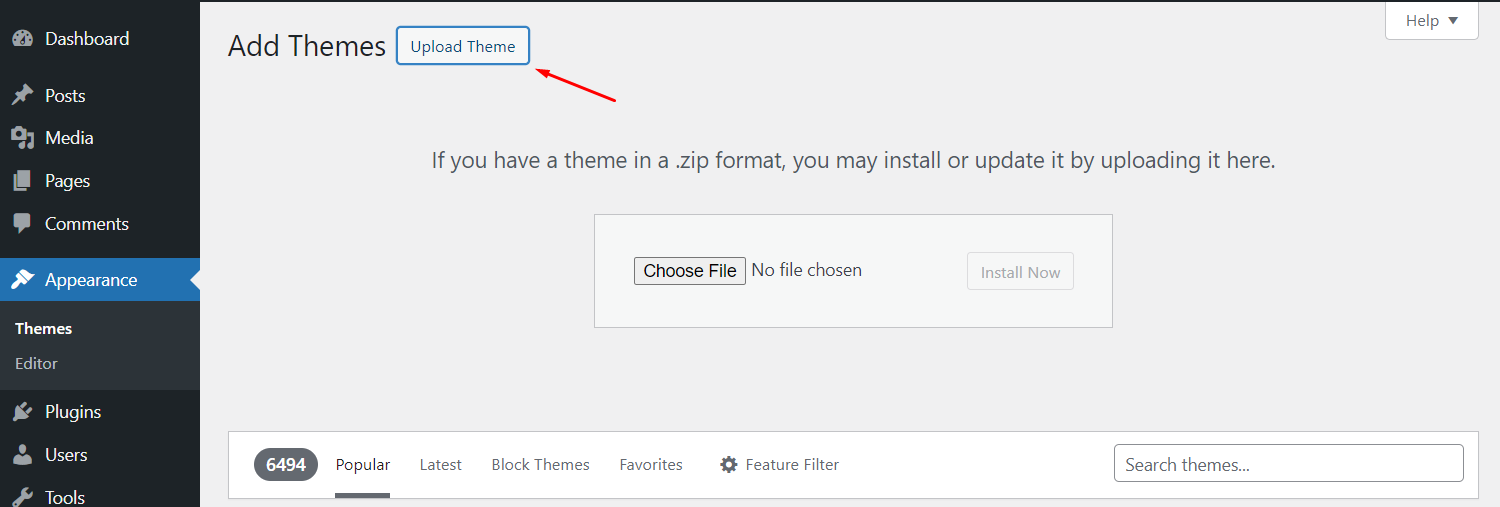
Step 2: Click the Add New button at the top of the page and go for the Upload Theme option.
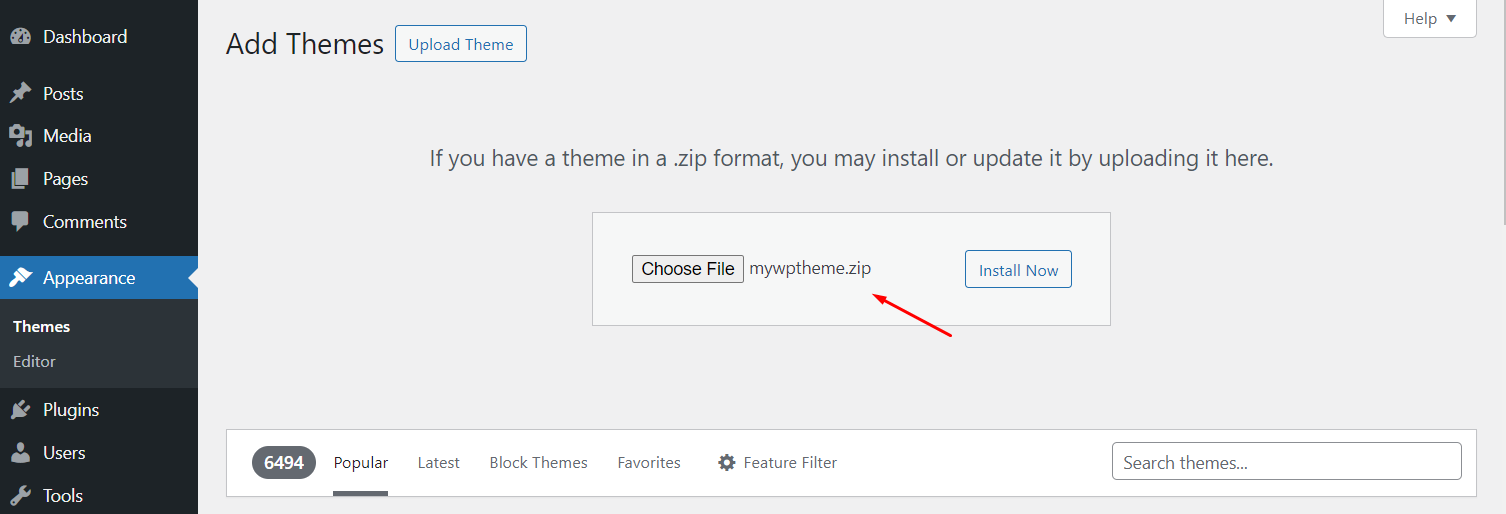
Step 3: Choose mywptheme.zip file then click Install button
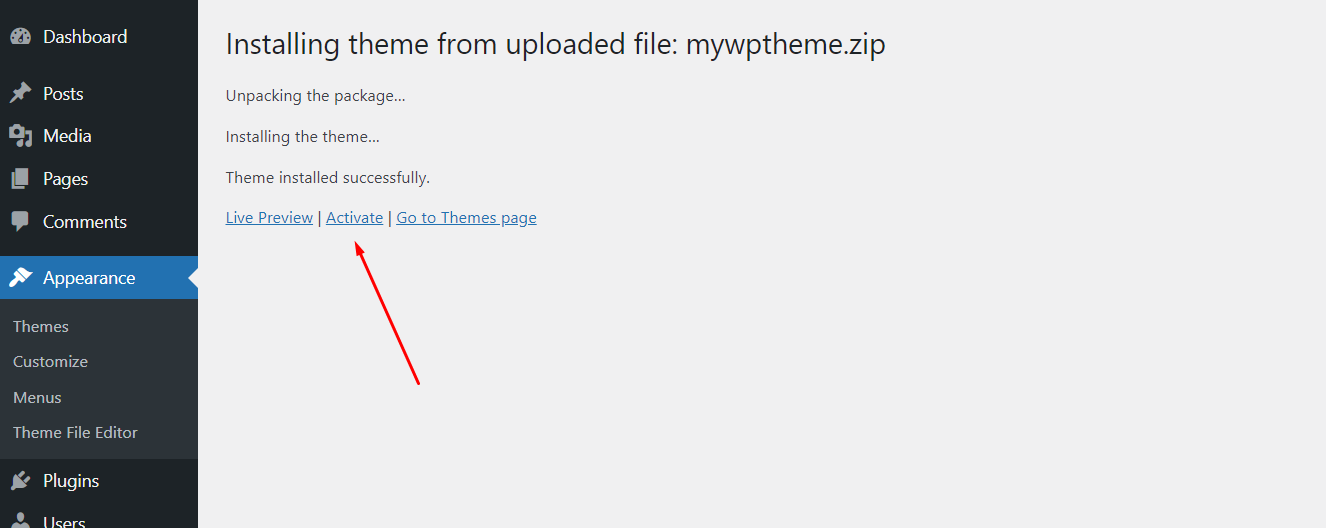
Step 4: Wait while the theme is uploaded and installed then activate the theme.
Plugins Installation
Plugins Using in MyWordPressTheme
- Elementor : Elementor is the most advanced website builder plugin
- ElementsKits Elementor Addons : Elementskit is all in one addons for Elementor Page Builder.
- Forminator Form : This plugin is to create contact forms.
- Ultimate Addons for Elementor : This plugin is use to create Header-Footer in Elementor
Follow the installation steps below:
Step 1 : Click on Begin installing plugins link
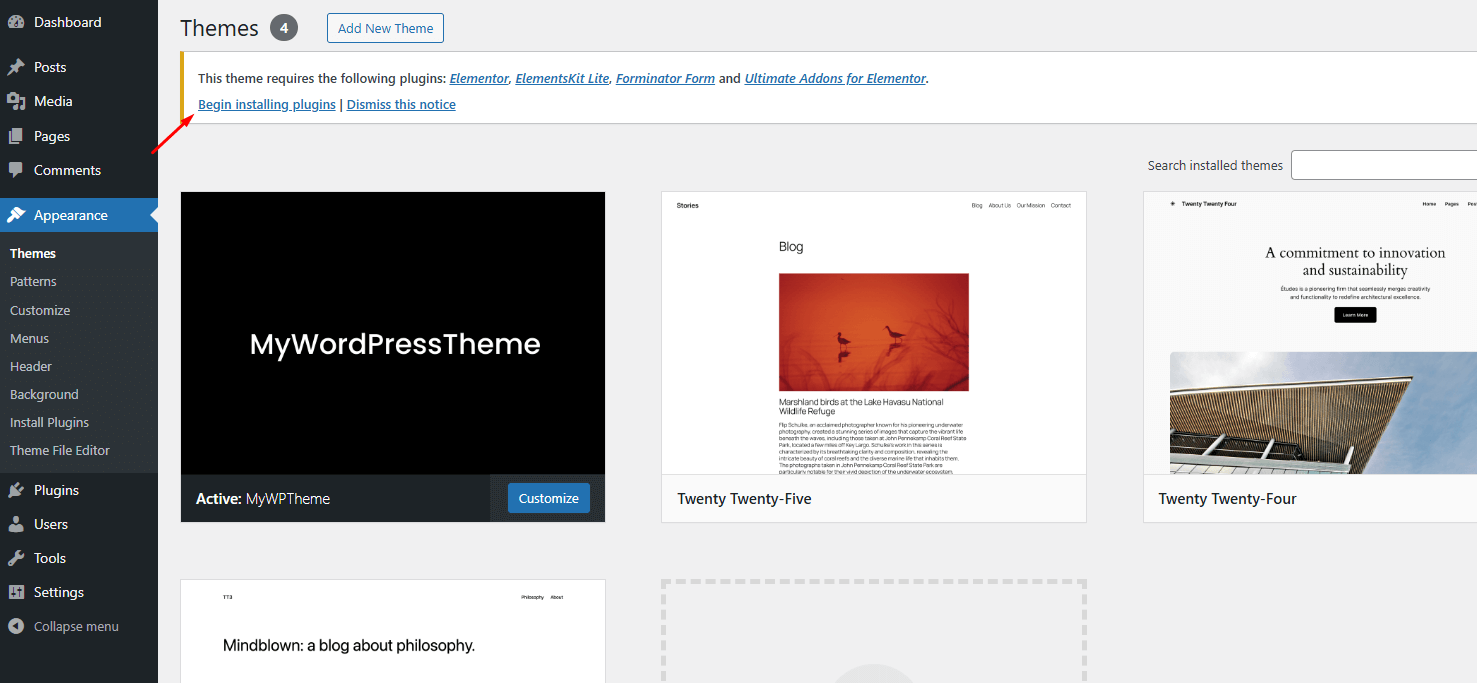
Step 2: Select all plugins then choose Install, Click Apply to install all plugins
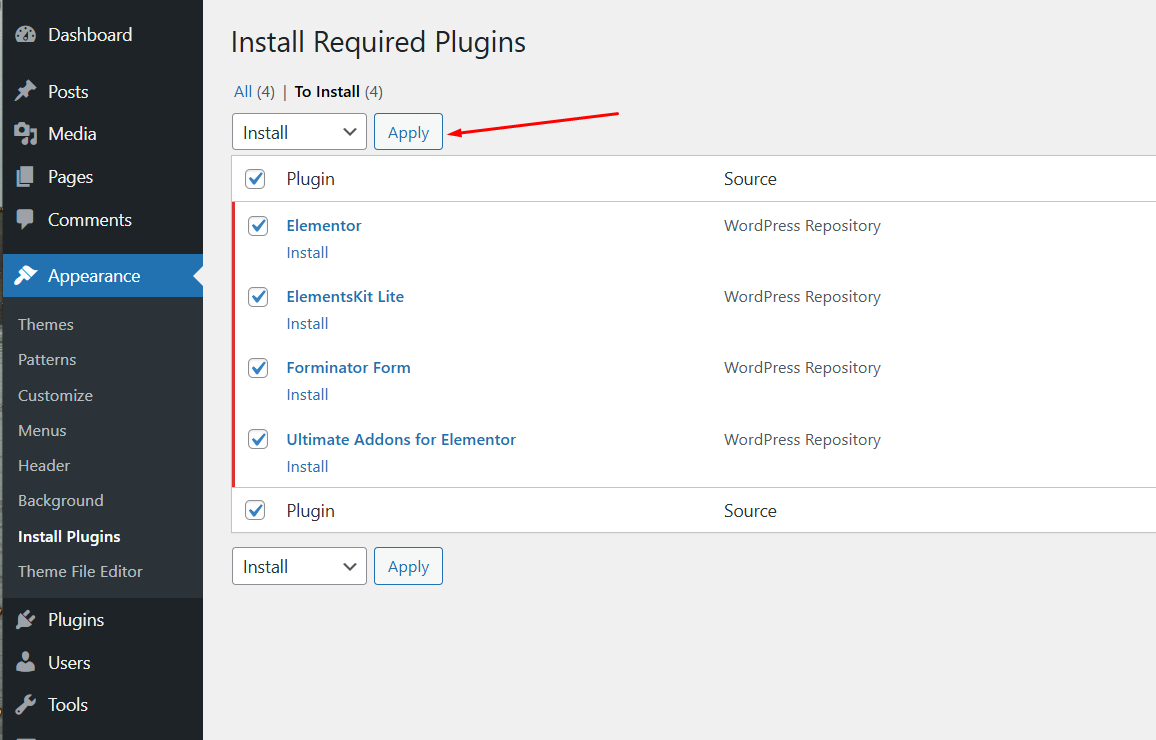
Step 3 : Click on Return to Required Plugins link
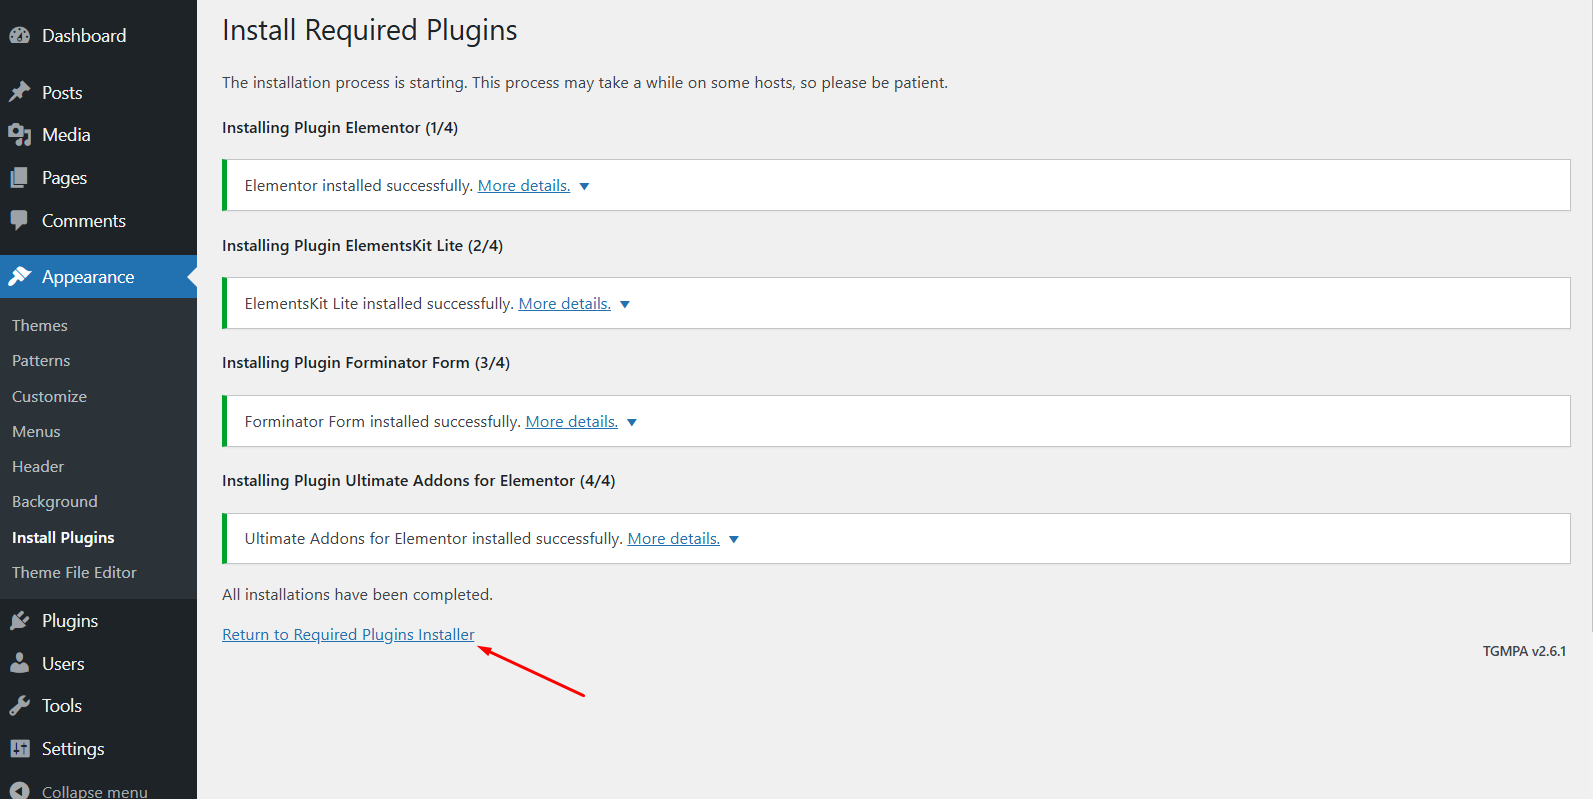
Step 4: Select Activate from dropdown then click on Apply to active all plugins.
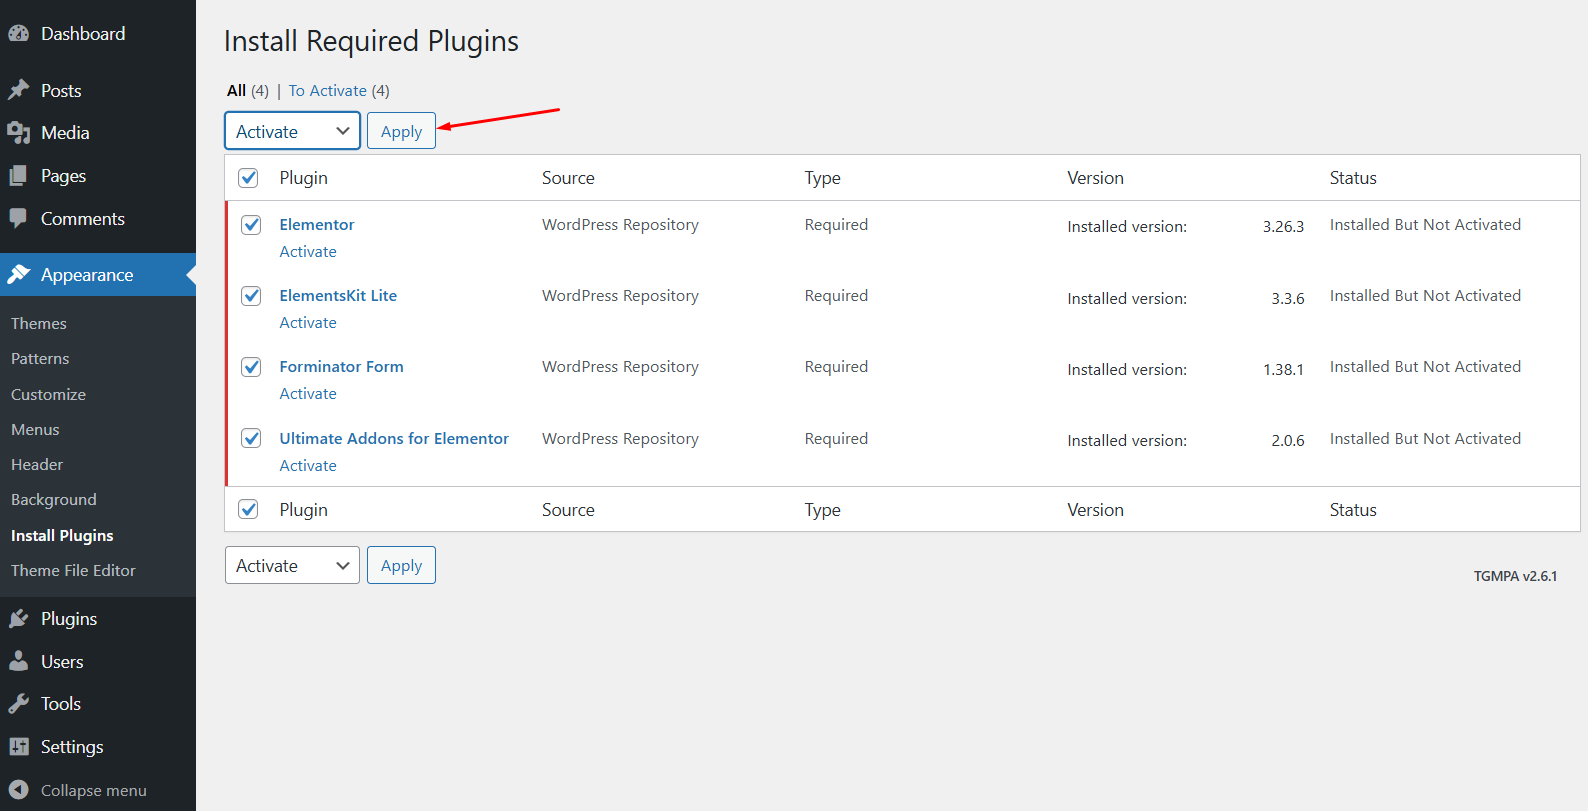
Step 5: Upon activation it will redirect to Elementor Onboarding Page, Simply Close it.

Import Demo Data
Step 1: Navigate to Tools → Import
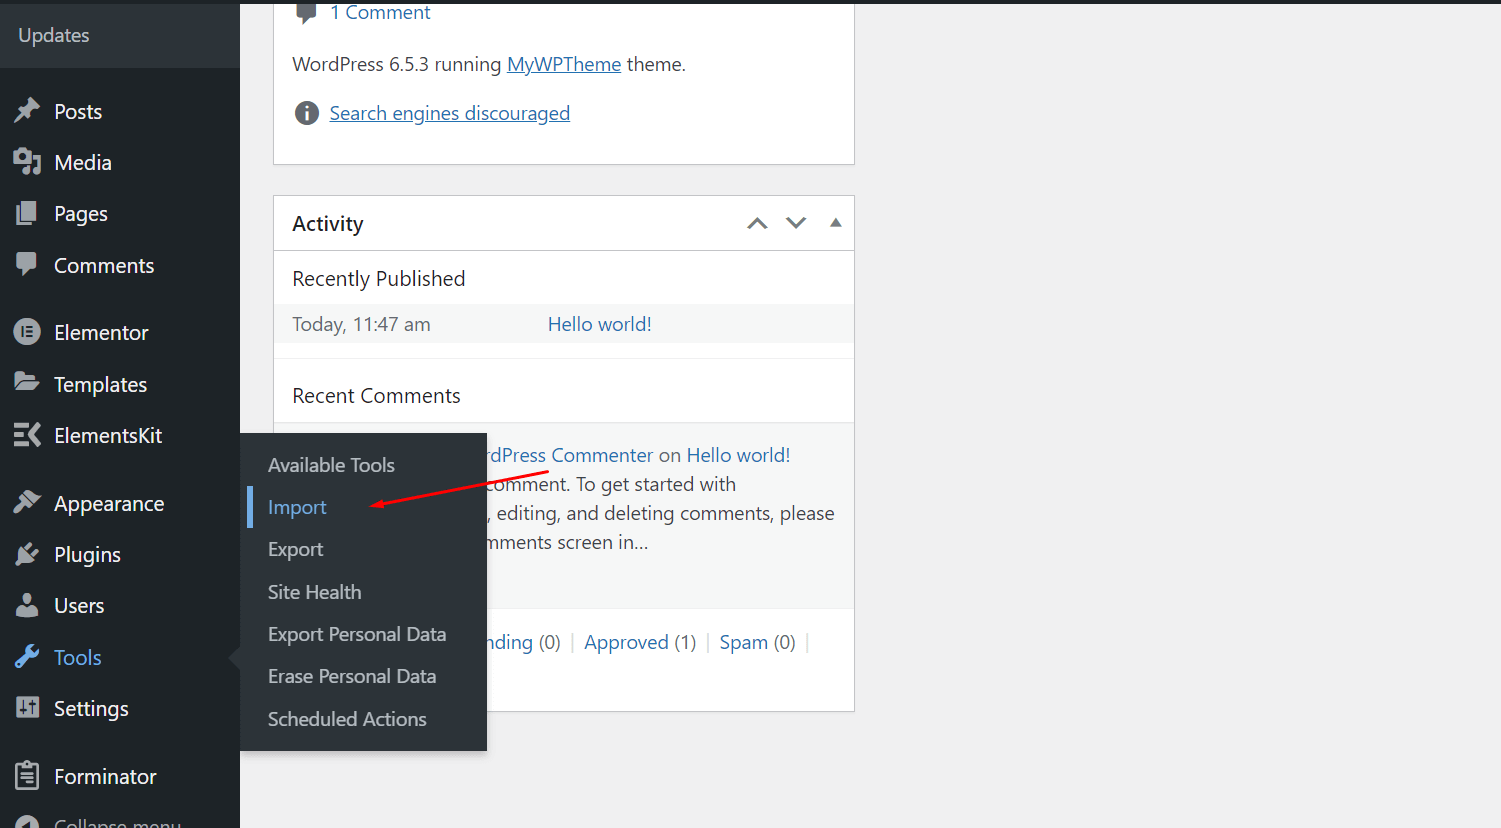
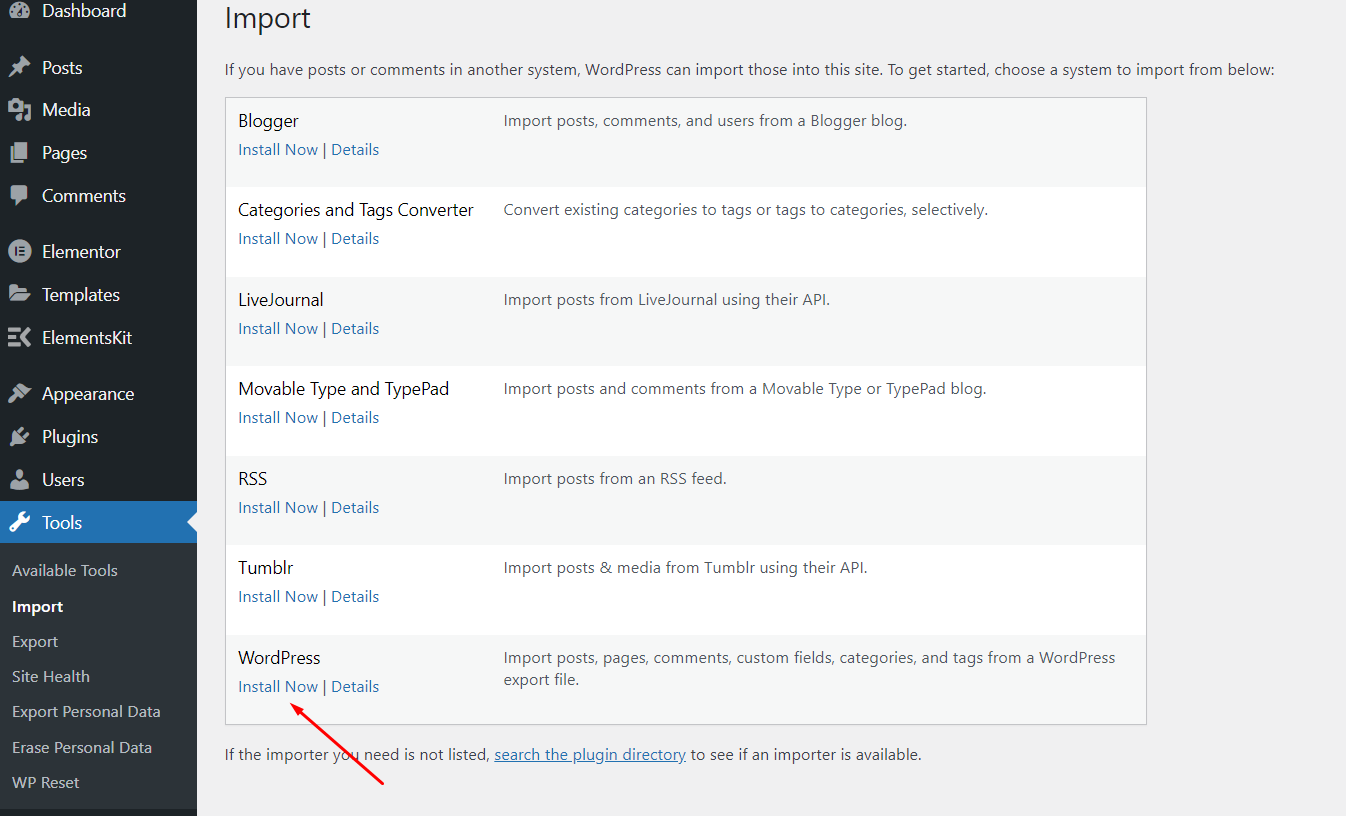
Step 2: Click on Install Now button below WordPress text
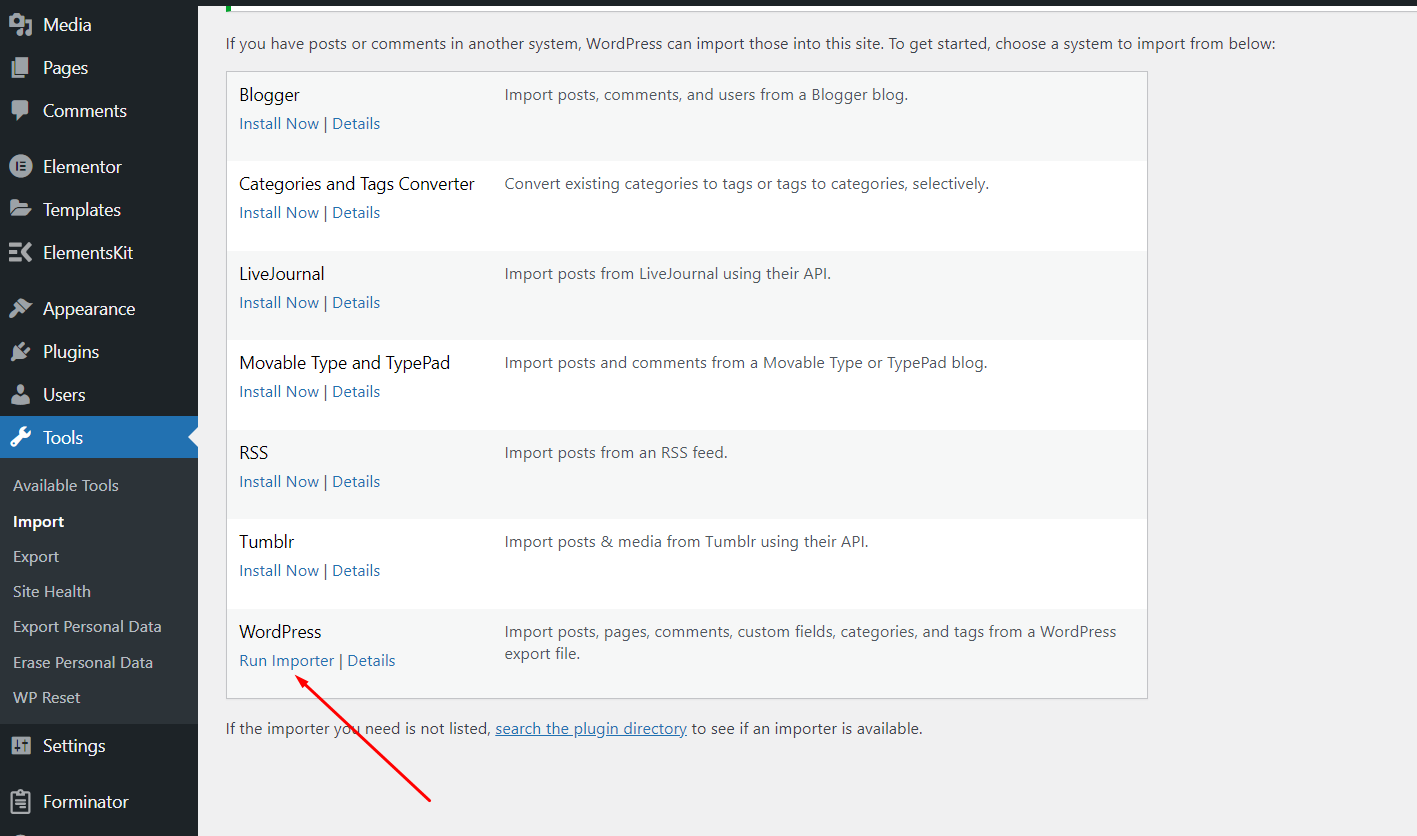
Step 3: Click on Run Importer button
Step 4: Choose demo-content.xml file given in demo content folder and click on Upload File & Import button
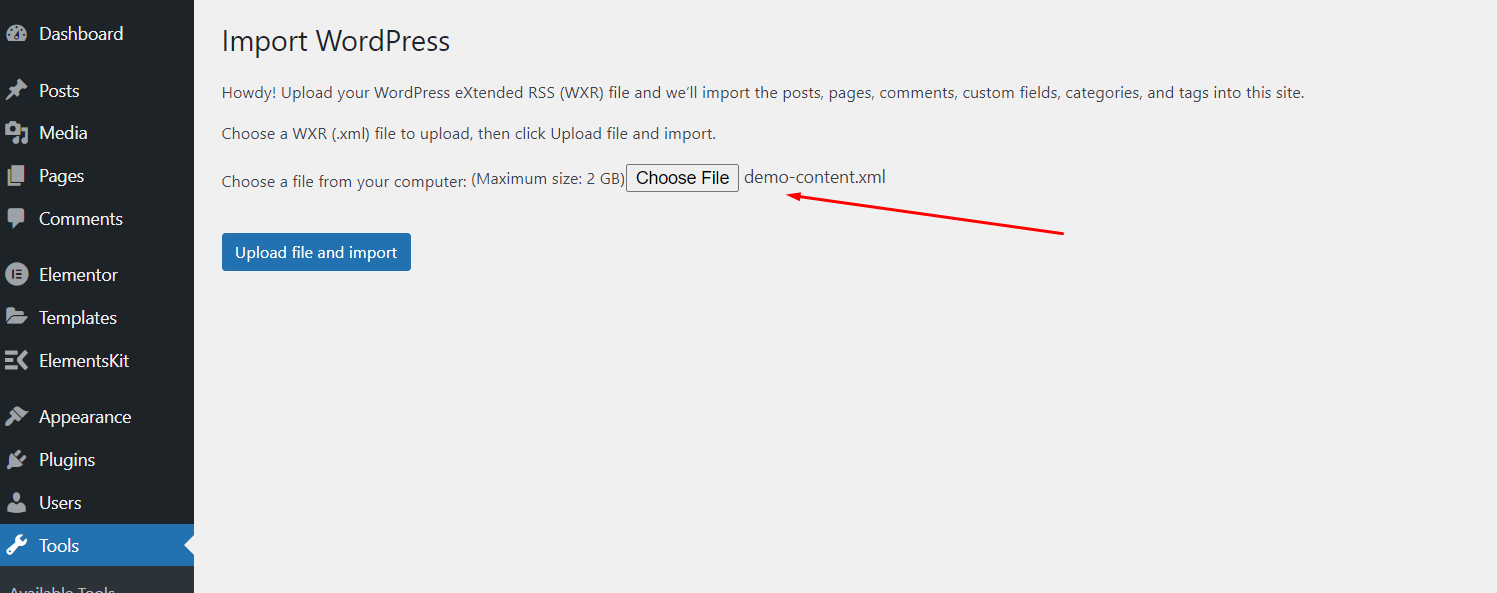
Step 5 : Select your existing WordPress user from dropdown
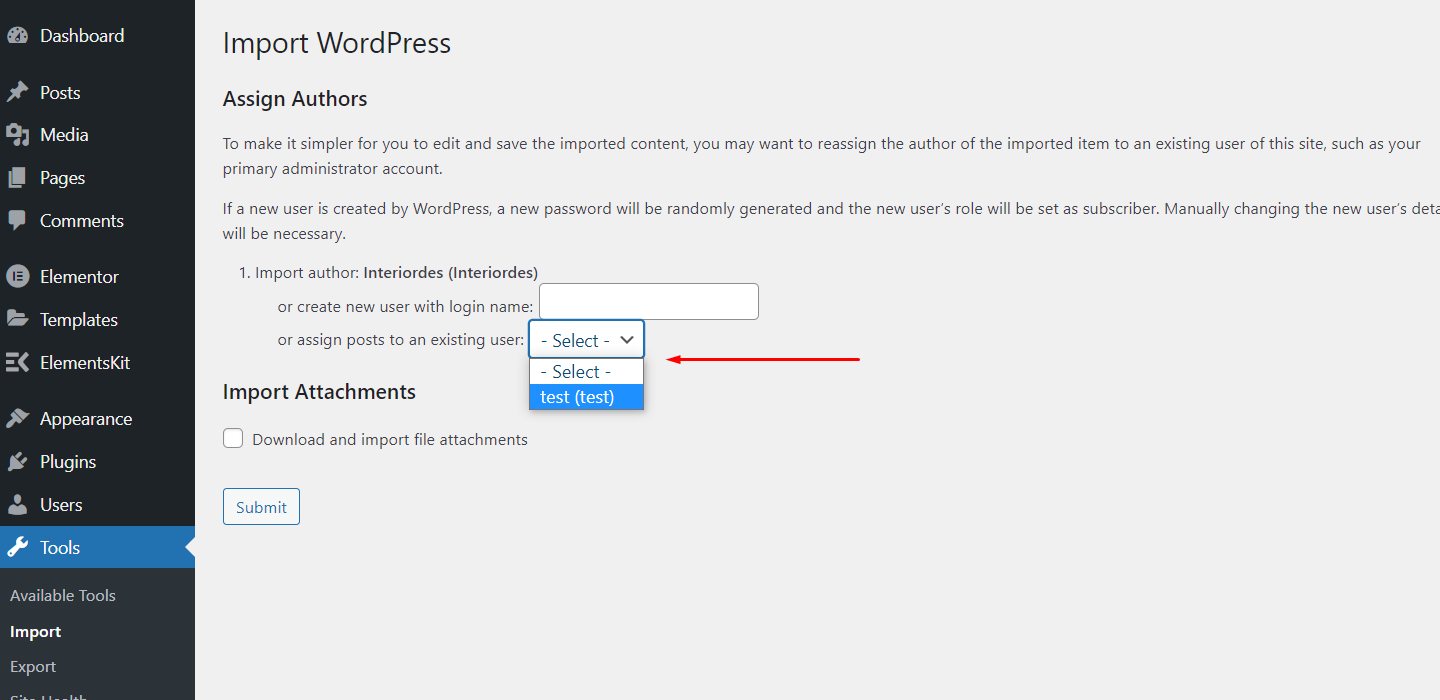
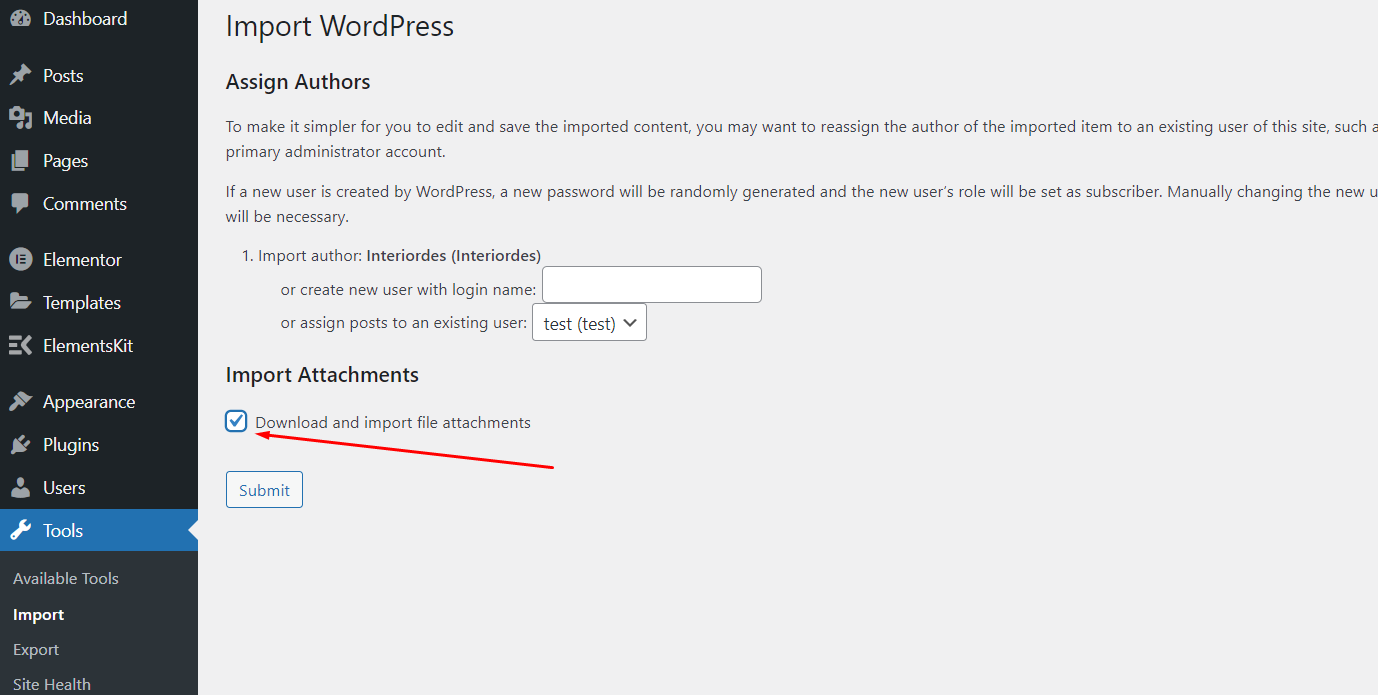
Step 6 : Then click on Download and import file attachments checkbox and click on Submit button
Step 7 : Wait until it shows All Done
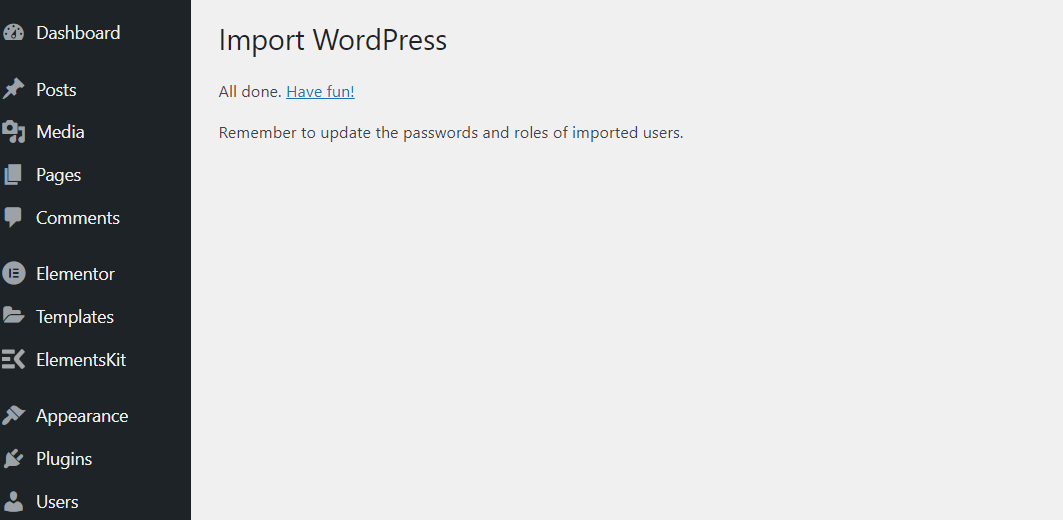
Now demo is imported in website
Replace Demo Website URL to Your Website URL
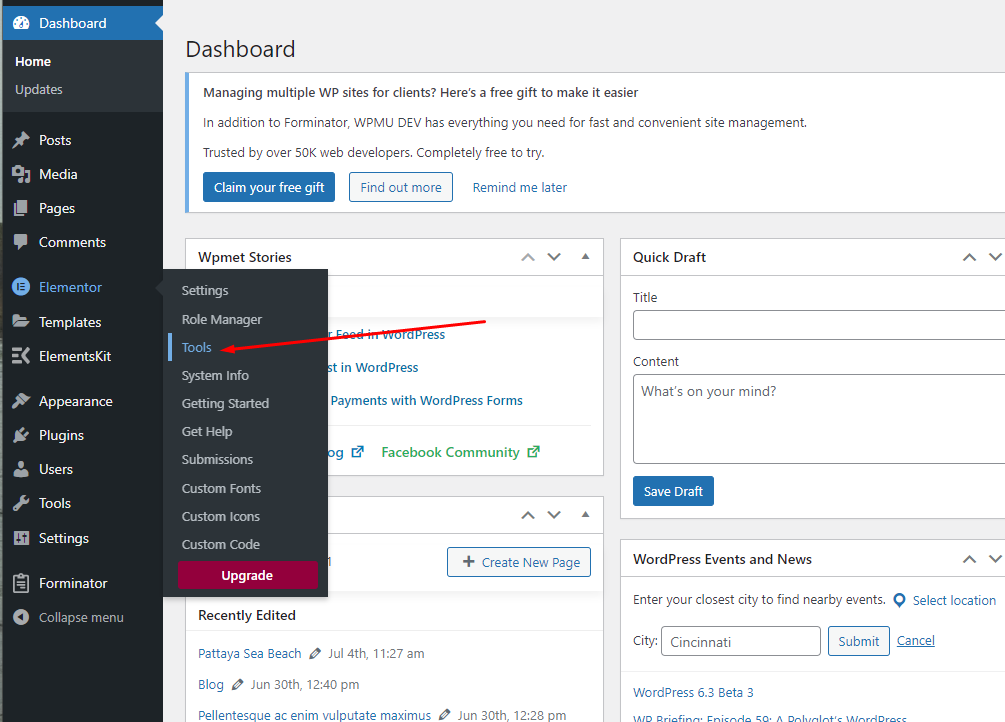
Step 1: Navigate to Elementor → Tools
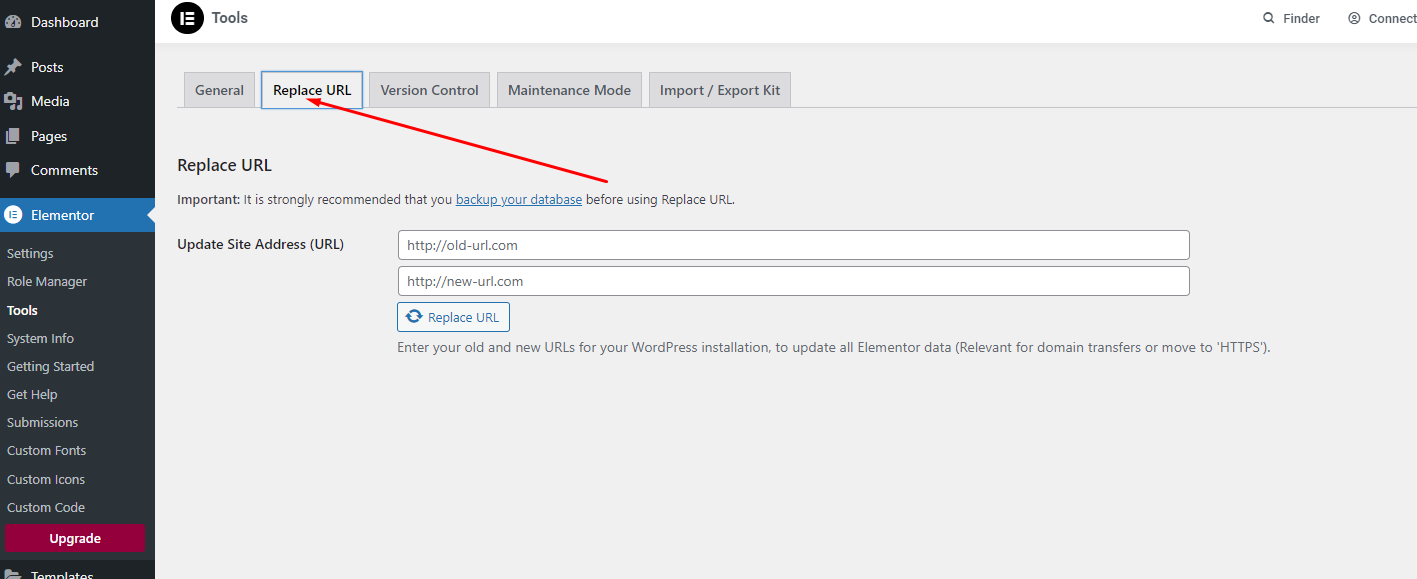
Step 2 : Click on Replace URL tab
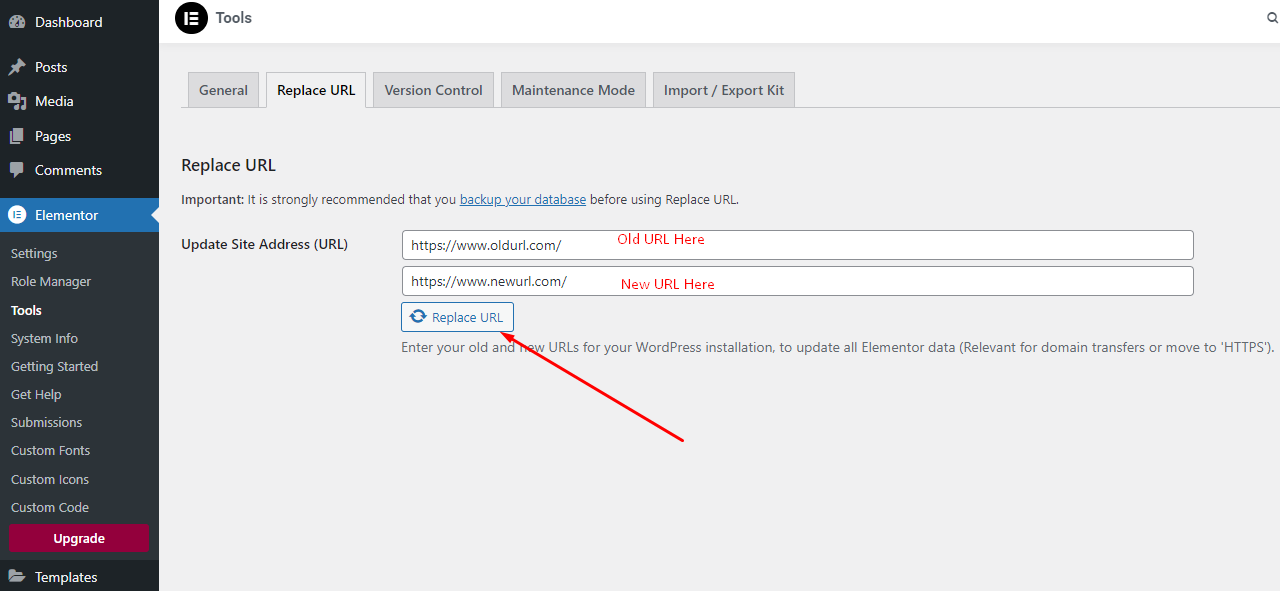
Step 3 : Add old url in old url textbox and new url in new url textbox then click on Replace URL button
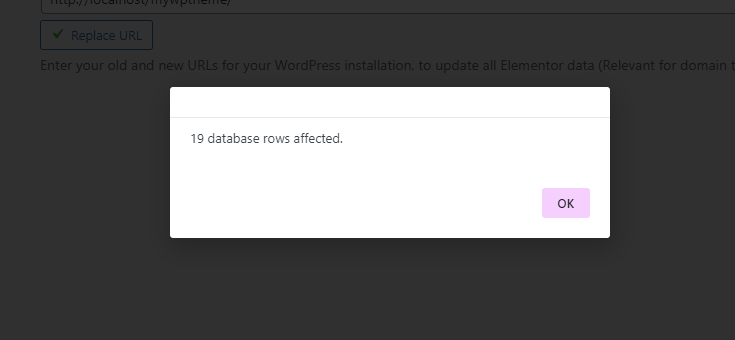
Step 4 : On successful URL replacement it will shows success message like below image
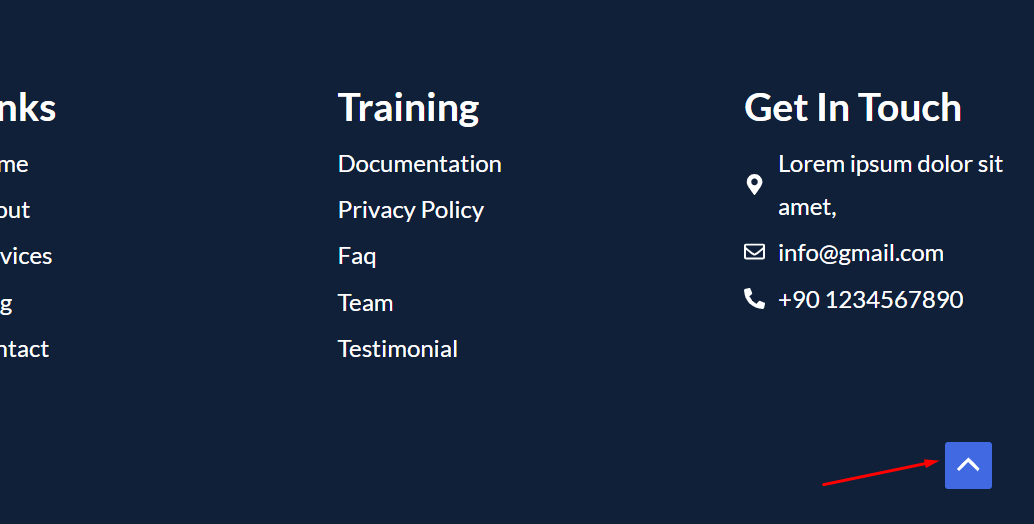
Manage Back to top button
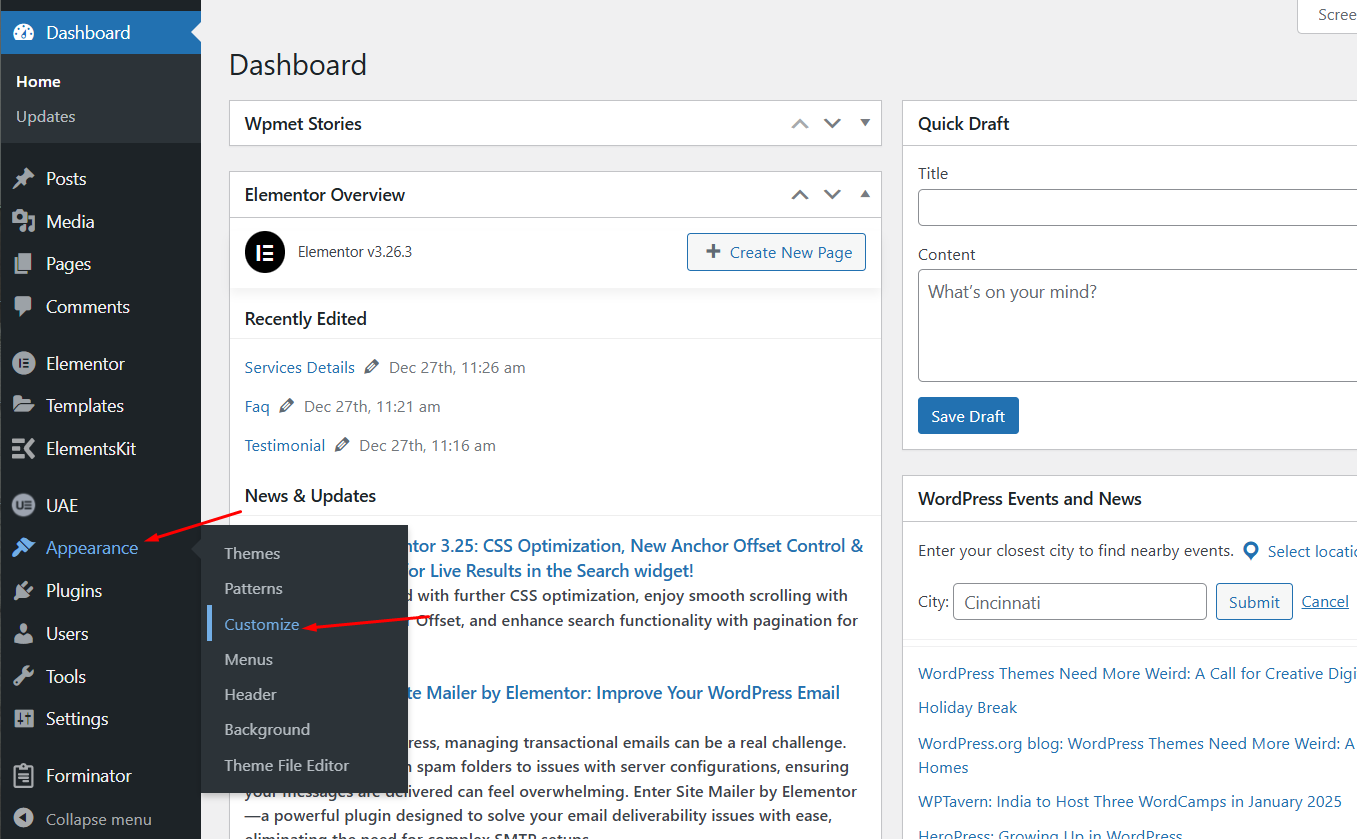
Step 1: Navigate to Appearance → Customize
Step 2 : Click on Back To Top tab
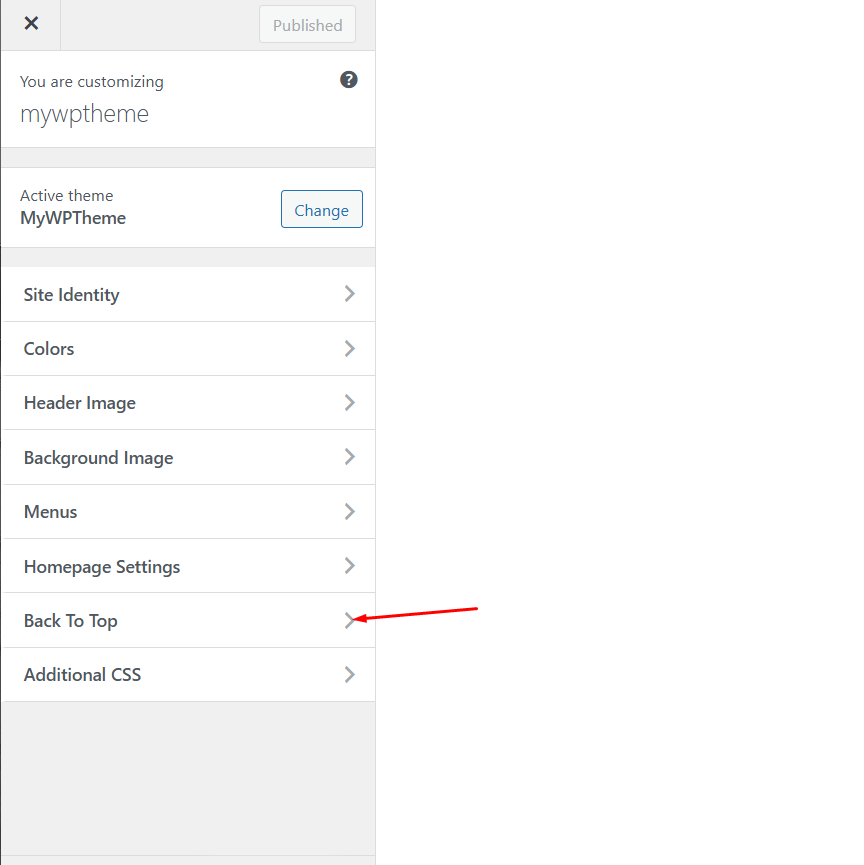
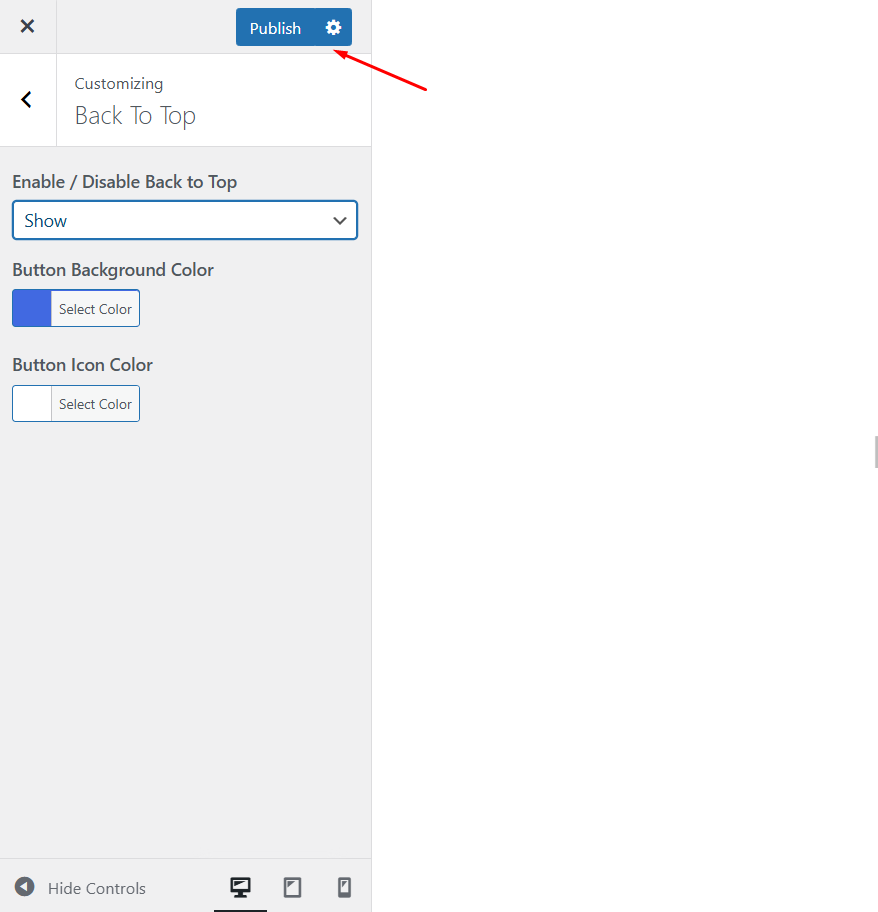
Step 3 : From here Back To Top button can be hide or show, also we can change button background color and icon color, after changes click on Publish button
